How To Add New Guest User in Windows 10?
Reader Question: “Hi Wally, how do i set up guest user account in windows 10?” – Evan L., USA
- Step 1 : Download PC Repair & Optimizer Tool (WinThruster for Win 10, 8, 7, Vista, XP and 2000 – Microsoft Gold Certified).
- Step 2 : Click “Start Scan” to find Windows registry issues that could be causing PC problems.
- Step 3 : Click “Repair All” to fix all issues.
Setting up weekly (or daily) automatic scans will help prevent system problems and keep your PC running fast and trouble-free.
Wally’s Answer: The Windows guest login feature enables you to share your computer with others without compromising your privacy. This blog post explains how to make a Guest / Visitor account in Windows 10.
What is A Guest Account?
A Guest account enables you to let someone else use your computer. Users on a Guest account can’t see your private data. They also have limited privileges. Which means that they can’t install any programs or change system settings.
Windows Used to Have a Default Guest Account
There used to be a default Guest account that you could enable in Windows. However, this feature has now been removed and its options have also been taken out of the graphical interface. However, you can still make a guest account by entering commands in a Command Prompt.
How To Make A Guest Account in Windows 10?
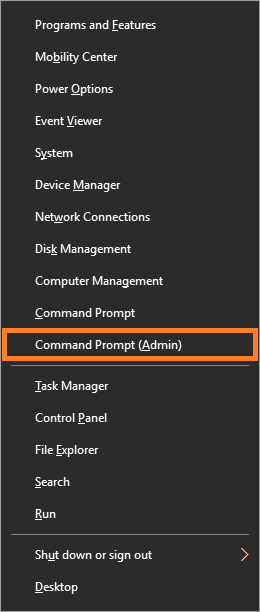
Press the Windows Key + X and click Command Prompt (Admin). Click Yes if you see a confirmation box.
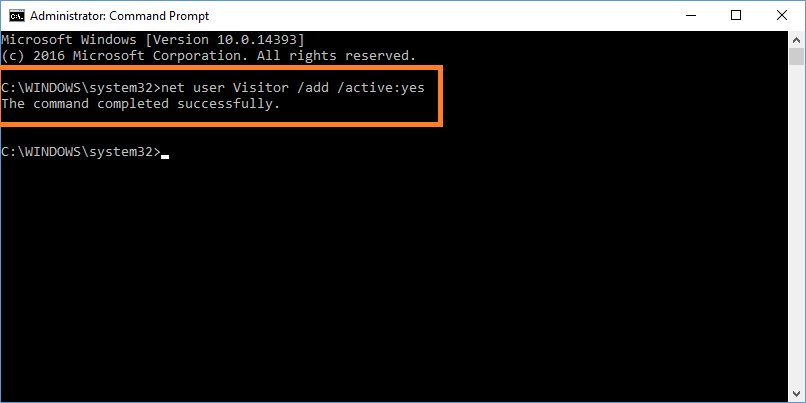
Type the following command: net user Visitor /add /active:yes and press Enter
Assigning A Password To The Account “Visitor”
Type the following command in the Command Prompt: net user Visitor * and press Enter. It will ask you for a password.
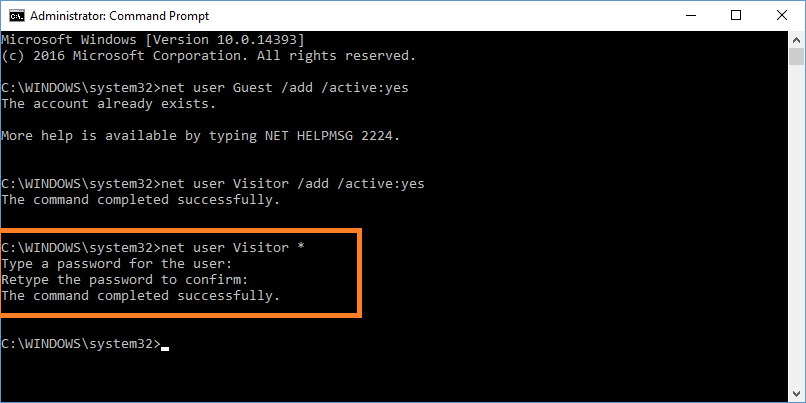
Just press Enter twice for a blank password. Otherwise, type your desired password and press Enter, type again to confirm.
Limiting The “Visitor” Account Further
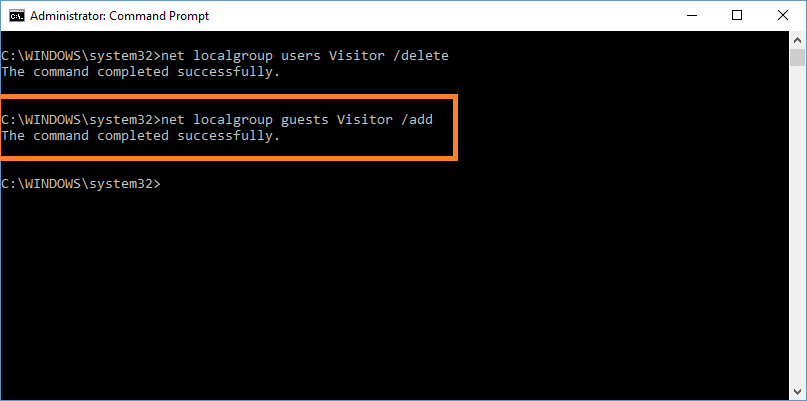
The “Visitor” account is a standard user account. However, we can limit it even more by deleting it from the localgroup and adding it to the guest group. net localgroup users Visitor /delete
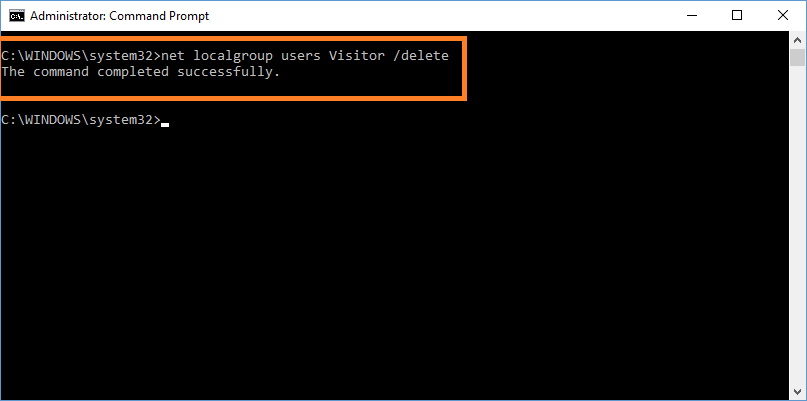
Now, all we need to do is to add the user “Visitor” to the guest group. Please use the following command: net localgroup guests Visitor /add
Close the Command Prompt and you’re done. Congratulations!! You’ve just added a new user with Guest privileges. A new user called “Visitor” should now start appearing when you log out or when you’re about to log in.
I Hope You Liked This Blog Article! If You Need Additional Support on This Issue Then Please Don’t Hesitate To Contact Me On Facebook.
Is Your PC Healthy?
I always recommend to my readers to regularly use a trusted registry cleaner and optimizer such as WinThruster or CCleaner. Many problems that you encounter can be attributed to a corrupt and bloated registry. Happy Computing! ![]()

Wally's Answer Rating
Summary: Every Windows Wally blog post is evaluated on these three criteria. The average of all three elements determines an "Overall Rating" for each blog post.


