How To Fix Error Code 0x80072f89 in Windows 10?
Reader Question:
“Hi Wally, I am getting Error Code 0x80072f89 whenever I try to send or receive email messages through the Mail application in Windows 10. Can anyone assist me please? ” – Courtney B., United Kingdom
Before addressing any computer issue, I always recommend scanning and repairing any underlying problems affecting your PC health and performance:
- Step 1 : Download PC Repair & Optimizer Tool (WinThruster for Win 10, 8, 7, Vista, XP and 2000 – Microsoft Gold Certified).
- Step 2 : Click “Start Scan” to find Windows registry issues that could be causing PC problems.
- Step 3 : Click “Repair All” to fix all issues.
Setting up weekly (or daily) automatic scans will help prevent system problems and keep your PC running fast and trouble-free.
Wally’s Answer: Windows 10 apps come installed with Windows 8 and Windows 10. They have simple features and a clean interface which makes them ideal for touch screens in particular. However, it can be annoying when they don’t work.
Here, we will discuss how you can fix the 0x80072f89 error when trying to run the Mail application.
Problem
The Mail app stopped working in Windows 10 and gave error code 0x80072f89
Solution
Here are two ways to fix the 0x80072f89 error of the Mail application in Windows 10.
Re-Register The Mail Application in Windows 10 Using The PowerShell
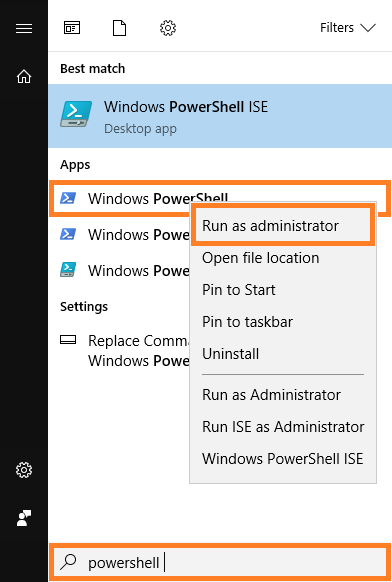
Run Windows PowerShell as an Administrator. You can do this by pressing the Windows Key and typing powershell to search for it. Right-click Windows PowerShell and click Run as Administrator as shown in the image below
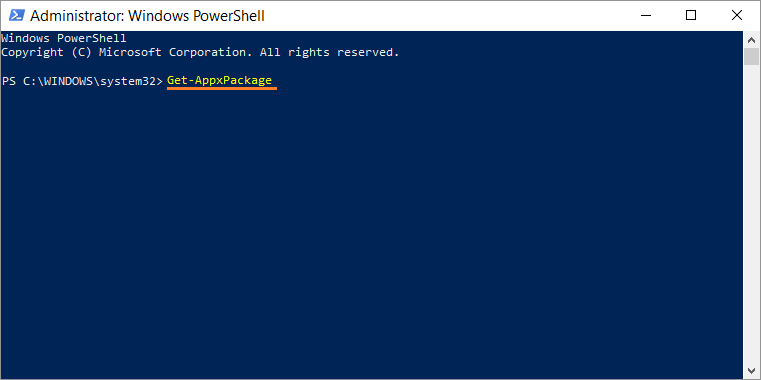
In the PowerShell window, type Get-AppxPackage, and press Enter to execute the command. It should load a lot of text.
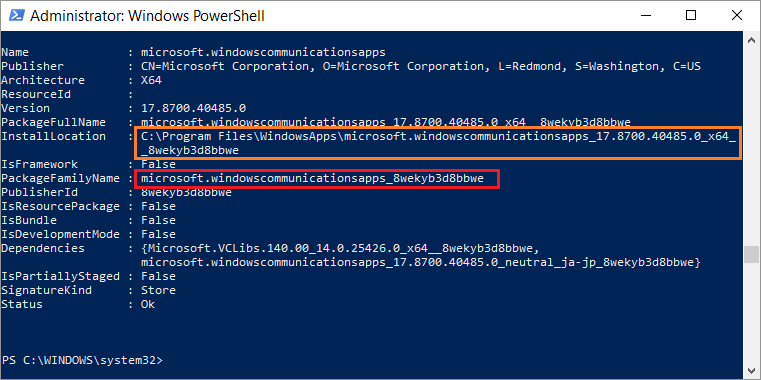
The last result should be the Mail app. You can identify it from its PackageFamilyName (Highlighted in Red). Please copy its InstallLocation (Highlighted in Orange). You will need the InstallLocation in the next command
Run the following command and replace InstallLocation:
Get-AppXPackage | Foreach {Add-AppxPackage -DisableDevelopmentMode -Register “InstallLocation\AppxManifest.xml”}
For example:
Get-AppXPackage | Foreach {Add-AppxPackage -DisableDevelopmentMode -Register “C:\Program Files\WindowsApps\microsoft.windowscommunicationsapps_17.8700.40485.0_x64
__8wekyb3d8bbwe\AppxManifest.xml”}
The command should run and re-register the app
Uninstall and Then Reinstall The Mail Application in Windows 10
You can uninstall the Mail app by following these steps.
First, Run the Powershell as Administrator. You can do this by pressing the Windows Key and typing powershell to search for it.
Right-click Windows PowerShell and click Run as Administrator as shown in the image below

Now, run the Get-AppxPackage command and press Enter
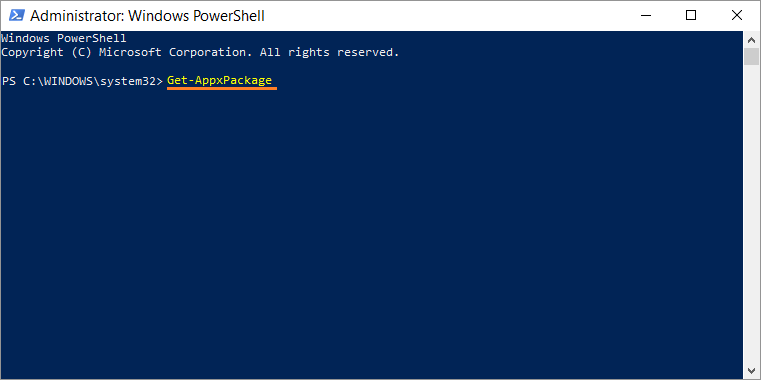
Copy the line underlined in Orange
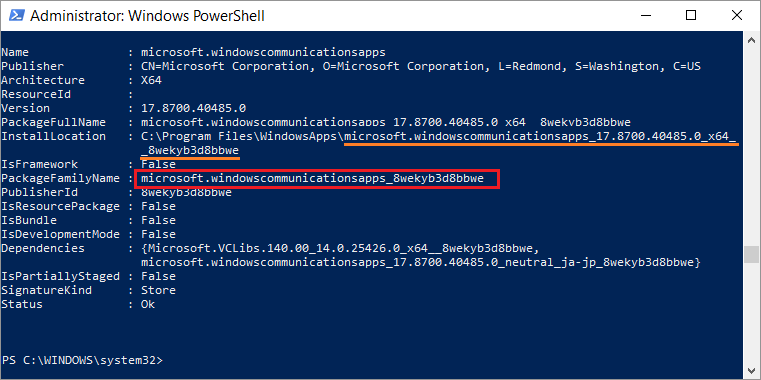
Now, run the following command and paste the text you just copied in the command
Remove-Appxpackage –Package microsoft.windowscommunicationsapps_17.6120.42011.0_x64__8wekyb3d8bbwe
The Mail app icon will still appear but it won’t work because it is uninstalled.
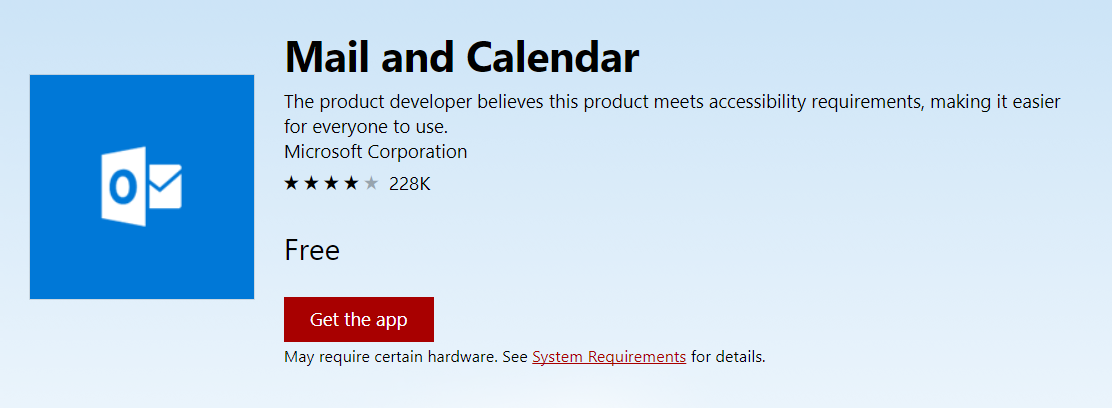
Now, Reinstall the Mail app from the Windows Store by clicking this link
Try using the SFC or DISM Tool To Fix The Problem
The DISM and SFC tools are built into Windows. You can run a simple command to run a scan using each of them. This will scan for and fix missing and/or corrupt Windows system files. This should fix whatever might be causing the app to not function correctly.
I Hope You Liked This Blog Article! If You Need Additional Support on This Issue Then Please Don’t Hesitate To Contact Me On Facebook.
Is Your PC Healthy?
I always recommend to my readers to regularly use a trusted registry cleaner and optimizer such as WinThruster or CCleaner. Many problems that you encounter can be attributed to a corrupt and bloated registry.
Happy Computing! ![]()

Wally's Answer Rating
Summary: Every Windows Wally blog post is evaluated on these three criteria. The average of all three elements determines an "Overall Rating" for each blog post.


