How To Fix The Dnsapi.dll Error In Windows 10
Reader Question:
“Hi Wally, Have you guys come up with a solution for the dnsapi.dll problem yet? Many Windows 10 users have seen this problem recently. Although, I think the anti-malware might have deleted it. Now I can’t browse the internet or use wi-fi. Is there any way to fix this problem.” – Chelsea F., New Zealand
Before addressing any computer issue, I always recommend scanning and repairing any underlying problems affecting your PC health and performance:
- Step 1 : Download PC Repair & Optimizer Tool (WinThruster for Win 10, 8, 7, Vista, XP and 2000 – Microsoft Gold Certified).
- Step 2 : Click “Start Scan” to find Windows registry issues that could be causing PC problems.
- Step 3 : Click “Repair All” to fix all issues.
Setting up weekly (or daily) automatic scans will help prevent system problems and keep your PC running fast and trouble-free.
Wally’s Answer: Windows 10 has been received very well by users worldwide with around 75 Million activations in the first month of its release. There are many happy users of Windows 10 but there are also some people who have experienced issues with it.
No operating system is perfect and Windows 10 is no exception. With that said, most Windows 10 issues are easy to fix. Here we will be looking at the dnsapi.dll problem.
Problem
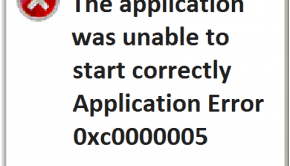
Wifi and web browsers (except for Microsoft Edge) are not working due to the missing dnsapi.dll file. The error may appear as:
Can not load DLL (dnsapi.dll)
dnsapi.dll is missing??
Cause
The dnsapi.dll file may have been deleted, moved, or corrupted somehow.
Solution
Here are some ways to fix the dnsapi.dll error:
Start The Computer In Safe Mode
Even though you may be able to start Windows normally, you should still start Windows 10 in Safe mode and then follow the troubleshooting instructions given below. Safe mode uses the least amount of drivers and services to start Windows. This makes it easier to work with system files like dnsapi.dll
Click here [Windows 10 Safe Mode] to learn how to start the computer in Safe Mode when using Windows 10.
Scan System Files Using The SFC /Scannow Command
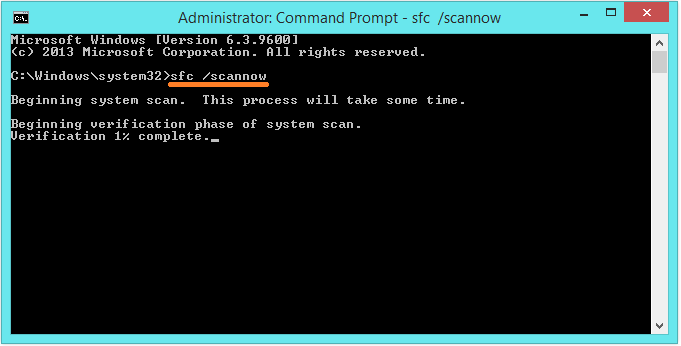
The sfc command is used to fix damaged system files and replace missing system files. Here’s how to use it:
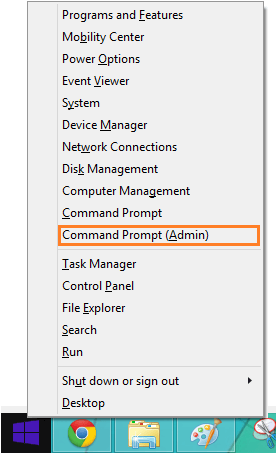
- Press Windows key + X > click Command Prompt (Admin)
- In the Command Prompt window, type sfc /scannow > Press Enter
Use Anti-Malware And Anti-Virus Software Carefully
The most common way that Malware and Viruses can cause these files to be deleted is by infecting them. After the file is infected, the virus scanner lists the file as infected.
If it can’t remove the virus from the file then it might incorrectly lead you to delete the file itself and cause these errors. That being said, you should use anti-virus software to completely remove the virus from the computer.
Use Windows 10 Recovery Options To Restore Windows
You can use these recovery options to reinstall Windows 10. This method is fast and does not require an installation disk.
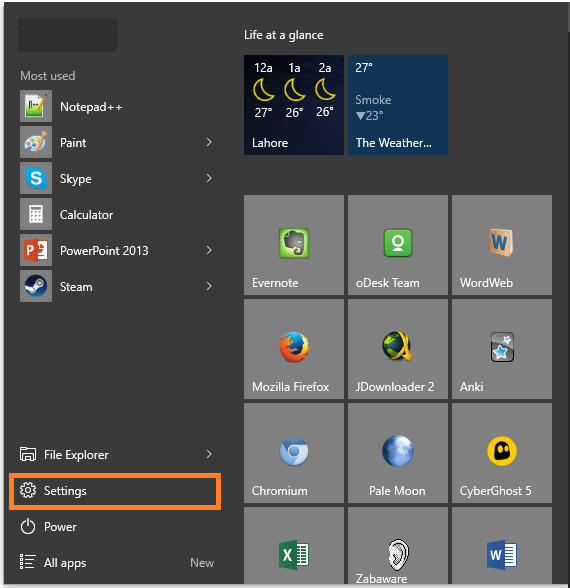
- Press the Windows Key > click Settings
- Click Update & Security
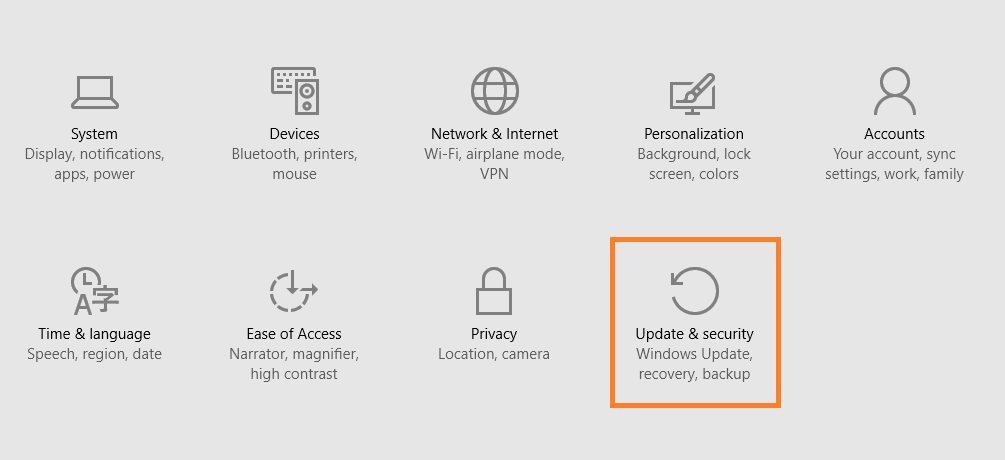
- Click Recovery from the left-pane > under Reset this PC, click Get started
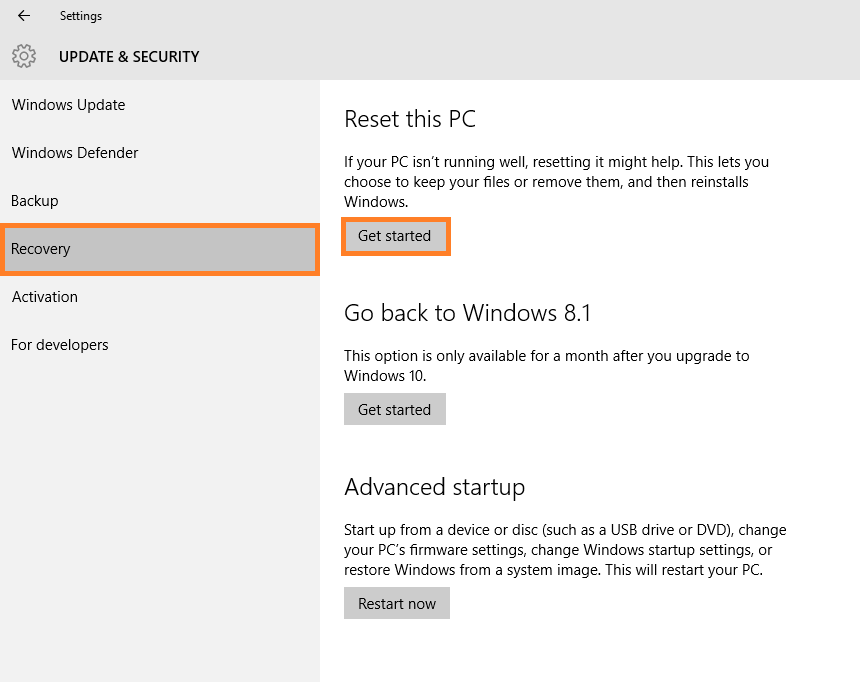
This is pretty much the last resort. In the rare chance that this doesn’t work for you, you’ll have to perform a clean install using a Windows 10 installation DVD/USB.
I Hope You Liked This Blog Article! If You Need Additional Support on This Issue Then Please Don’t Hesitate To Contact Me On Facebook.
Is Your PC Healthy?
I always recommend to my readers to regularly use a trusted registry cleaner and optimizer such as WinThruster or CCleaner. Many problems that you encounter can be attributed to a corrupt and bloated registry.
Happy Computing! ![]()

Wally's Answer Rating
Summary: Every Windows Wally blog post is evaluated on these three criteria. The average of all three elements determines an "Overall Rating" for each blog post.


