Sharing Files Between Computers Running Windows 10
Reader Question:
“Hi Wally, I have two computers. A laptop running Windows 7 and a desktop running Windows 10. Networking them together has failed miserably and I can find no help in the help file or on the web. Please help me find the easiest way to share files between these two computers. Thank you.” – Jeremy L., USA
Before addressing any computer issue, I always recommend scanning and repairing any underlying problems affecting your PC health and performance:
- Step 1 : Download PC Repair & Optimizer Tool (WinThruster for Win 10, 8, 7, Vista, XP and 2000 – Microsoft Gold Certified).
- Step 2 : Click “Start Scan” to find Windows registry issues that could be causing PC problems.
- Step 3 : Click “Repair All” to fix all issues.
Setting up weekly (or daily) automatic scans will help prevent system problems and keep your PC running fast and trouble-free.
Wally’s Answer: Being able to access files from another computer on the network can make things so much easier. Playing a video file on your Media Center PC from your laptop computer, or opening an excel sheet from your work computer while on your home PC is convenient. But, only if it works.
Problem
User is not able to share files between two computers on the same network. One computer is running Windows 7 and the other computer is running Windows 10.
Solution
Here are some ways to troubleshoot file sharing between Windows 7 and Windows 10:
Make a HomeGroup in Windows 10 and Windows 7
HomeGroups are a great way to securely share files between Windows computers. You can select Folders and Libraries to share between computers connected to the same HomeGroup.
Press the Windows Key and start typing homegroup to search for it. Click HomeGroup from the list of search results. The following Window should appear:
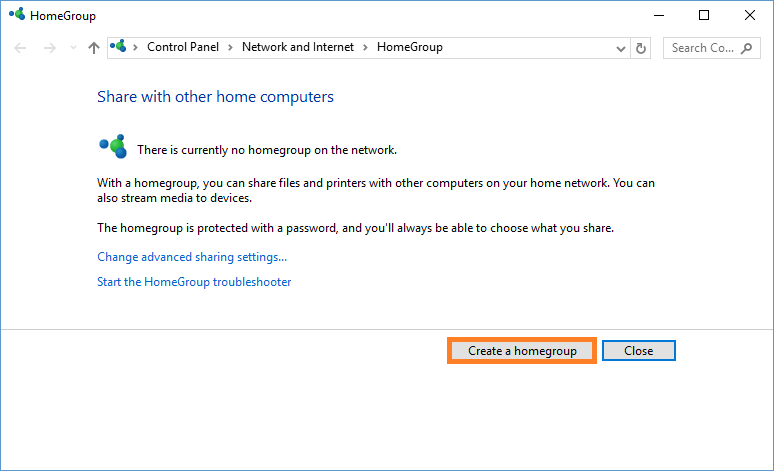
Click the button labeled Create a homegroup and follow the instructions. Select what you want to share, and click Next.
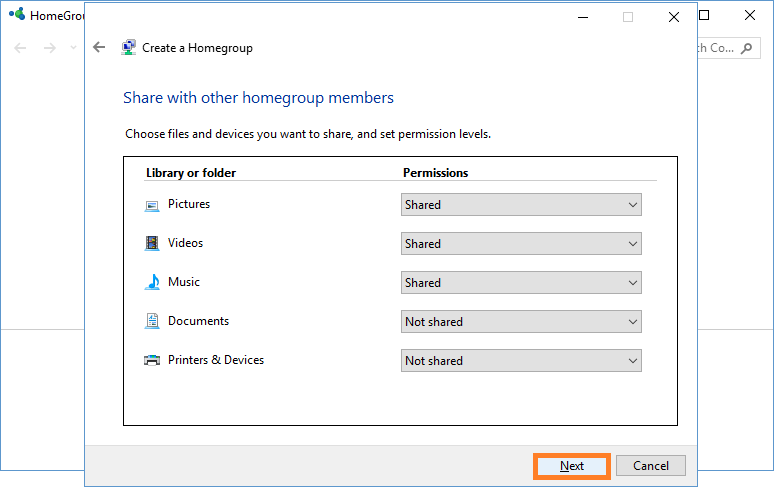
It should give you a password. Take a picture of the screen or write the password down on a piece of paper. Now, go to the other computer. Make sure that it is also connected to the same WiFi or Ethernet network or else they won’t be able to see each other.
Open HomeGroup on the other computer and this time Join an existing Home Group. Enter the password you got earlier and click Next to join.
Try Turning It Off and On Again
This might sound silly, but if you’re not able to share files on the HomeGroup after following the above procedure, then try turning both computers and the router off and on again. This might solve the problem.
I Just Want To Share A Stupid Folder
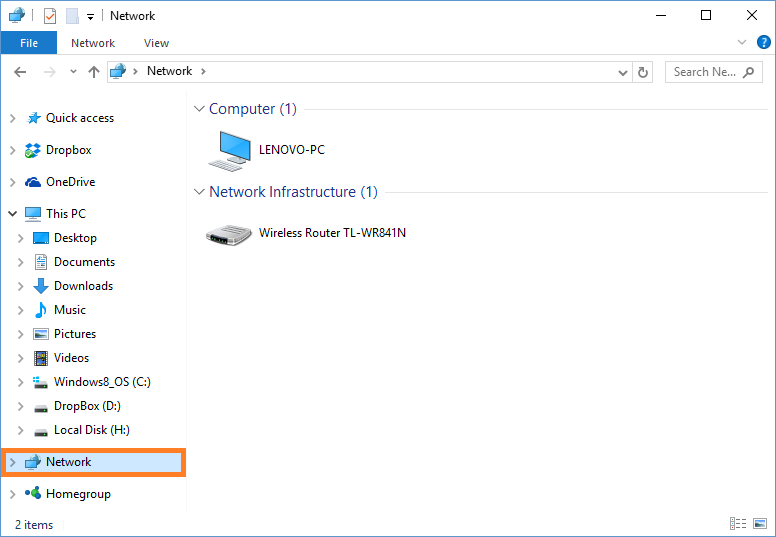
You could right-click a Folder and turn on sharing right from the Sharing tab. The file would show up in the Network folder for the other computers. But, it might not show up on other computers without a little configuration.
Lately, it has gotten a bit more complicated with the new Windows file security features in Windows 7 onward. You can take a risk by changing the ownership settings for a folder to Everyone. This will enable you to share the folder with pretty much any device on the network (Android Apps, Linux, Windows, etc).
Right-Click the folder you want to share and click Properties
Click the Security tab and click Edit
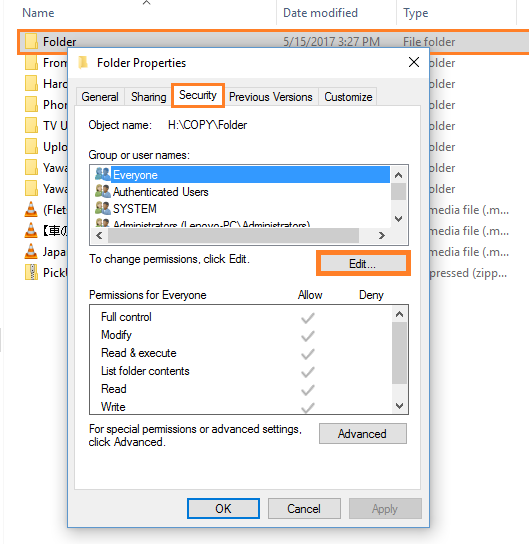
Click Add
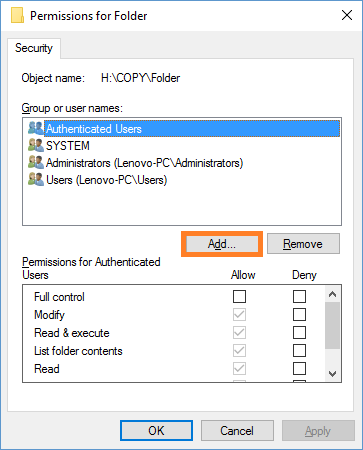
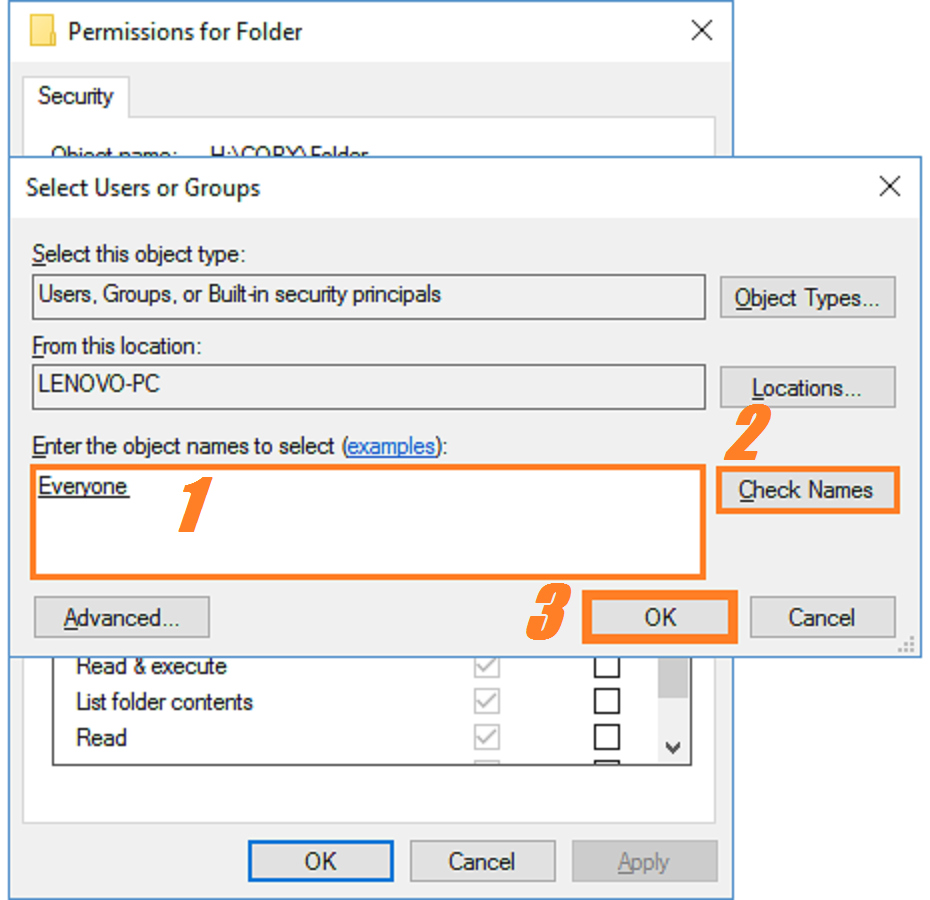
Click inside the box and type Everyone. Click the Check Names button, and the underline should appear as shown in the picture After that, click OK.
Now, Right-click the folder again. This time, click the Sharing tab and click the button labeled Advanced Sharing…
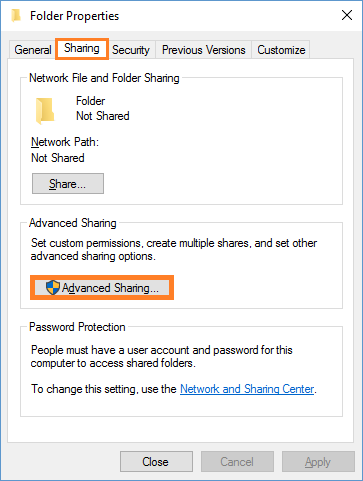
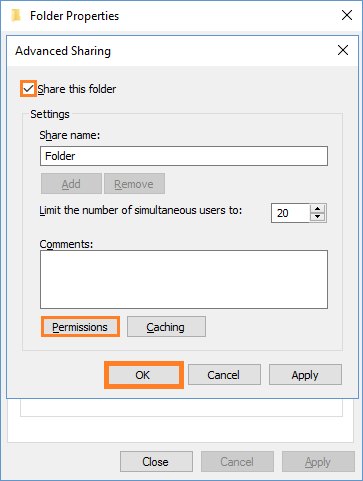
Click the checkbox labeled Share this folder and click the Permissions button to give the permissions you want for this folder. Click OK to save settings.
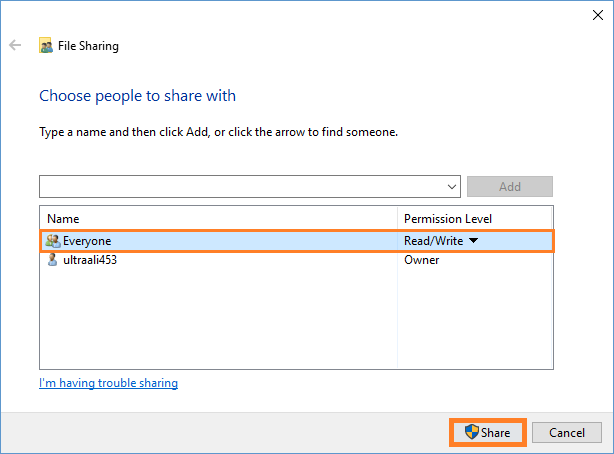
Click the Share button and select who to share with. Click Share
This shared folder should now appear under Network.
One Last Step
Now, simply open the Advanced sharing settings by searching in the Start Menu
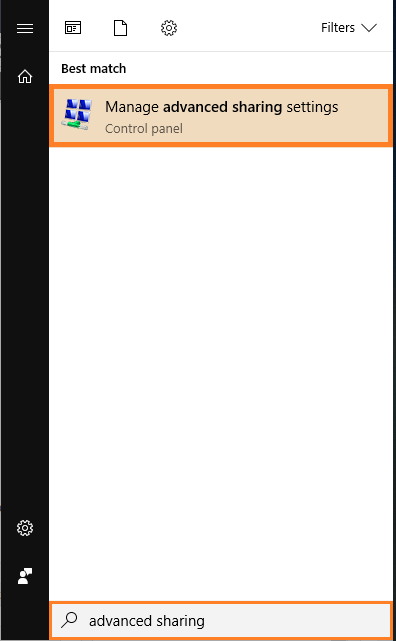
Make sure to change these two options and click Save changes
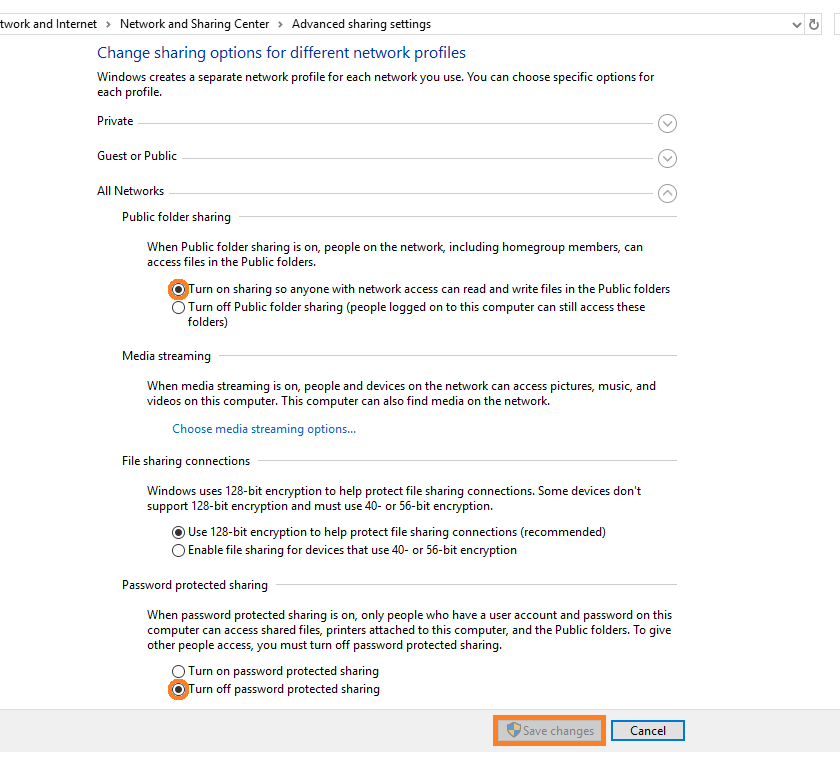
Do each of these steps on both computers to share files and folders.
If all else fails
Sometimes, despite all of these settings, you will still not be able to see anything in the Networks folder.
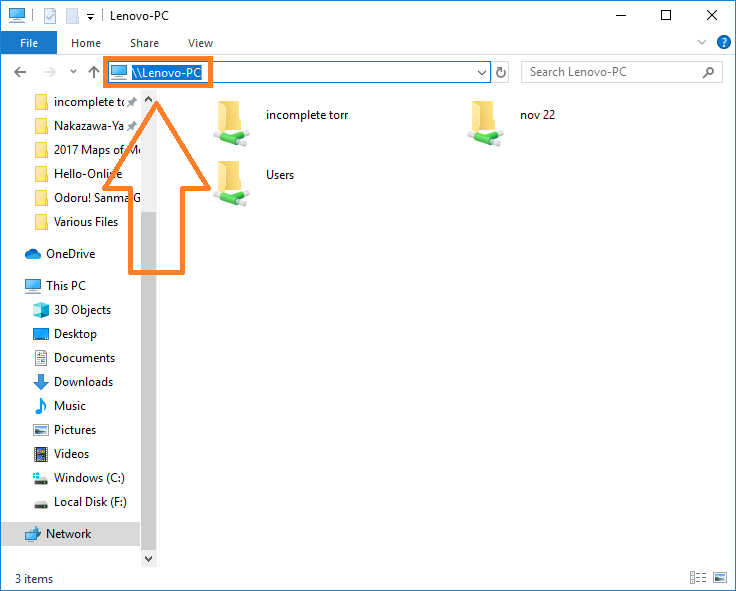
However, you may be able to access the Network shared folder by typing its location directly in the address bar of the File Explorer.
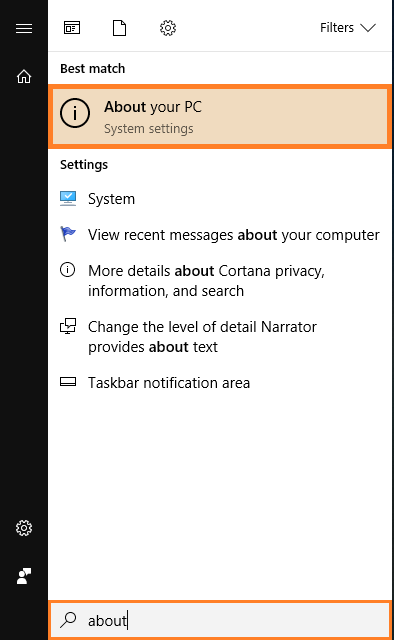
You will need the name of the computer that you’re trying to reach. You can find this name in the About your PC
Copy the Computer’s name
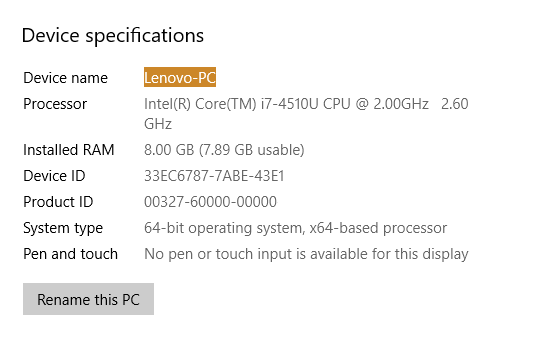
Now, type this computer name in the File Explorer’s address bar like so and press Enter to see your shared folders
Restart all computers among whom you wish to share files over the network.
Were you able to access that folder over the Network? If not, then you can receive additional support on this issue by contacting me on Facebook.
Is Your PC Healthy?
I always recommend to my readers to regularly use a trusted registry cleaner and optimizer such as WinThruster or CCleaner. Many problems that you encounter can be attributed to a corrupt and bloated registry.
Happy Computing! ![]()

Wally's Answer Rating
Summary: Every Windows Wally blog post is evaluated on these three criteria. The average of all three elements determines an "Overall Rating" for each blog post.

